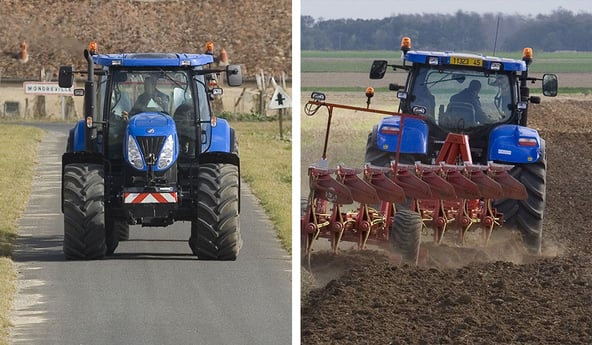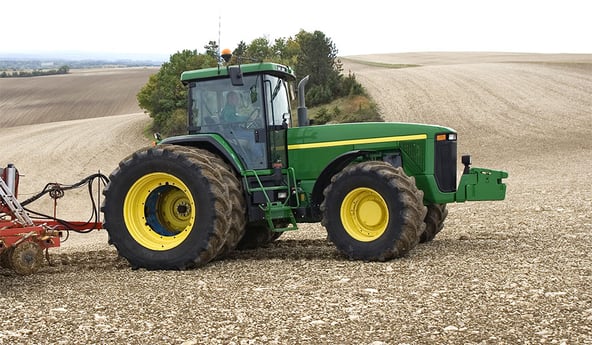
Repairing the tyre is obviously an economic and logical solution for punctures and may also be a solution for more serious damages.
There are different types of hot or cold repairs which correspond to very precise damages. However, you must bear in mind that in certain cases repairing the tyre is not the solution, because the repair will not last long and your tractor will be immobilised again with further damages. In other cases, unsuitable repairs may place you in danger and lead to an accident on the road, especially if your tractor is loaded.
In this article, we will look in detail at the best repair solutions and the cases in which they are most effective.
1. When and how to use hot repairs (vulcanisation)
Hot repairs are suitable for all wounds or cuts situated on the tread or upper part of the sidewall of your tractor tyres. Your tyres must keep their suppleness and flexibility to allow tyre pressure to be adjusted depending on the type of ground you are driving on or the load you are carrying.
If the damaged area is too big, preference should be given to hot repairs, because a cold repair will not be sufficiently uniform with the original rubber to last and resist the regular solicitations faced by your tyres or the constant flexion movement.
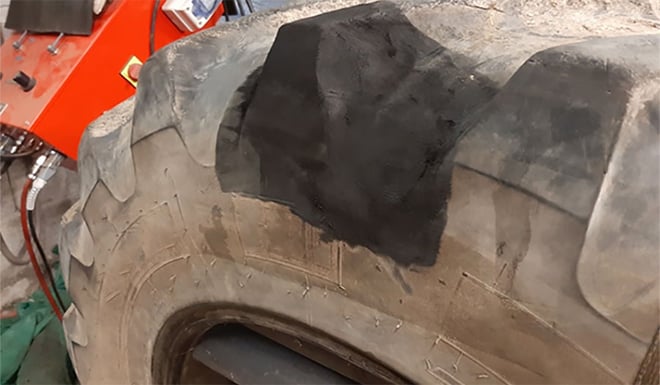
How to perform hot repairs
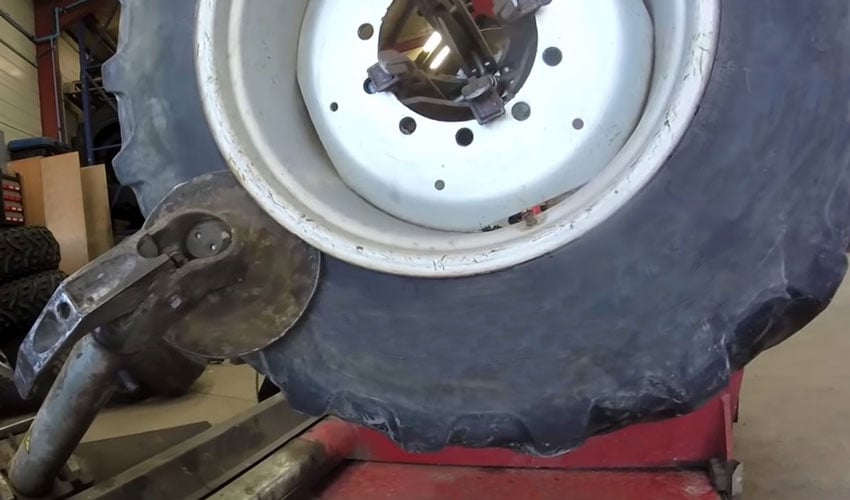
Hot repairs to tractor tyres must be carried out in a very clean workshop to avoid impurities which could slip into the repair work.
After having completely deflated the tyre, you may go ahead and dismount it, beginning by unseating the tyre from the rim using levers, if you have no other equipment.
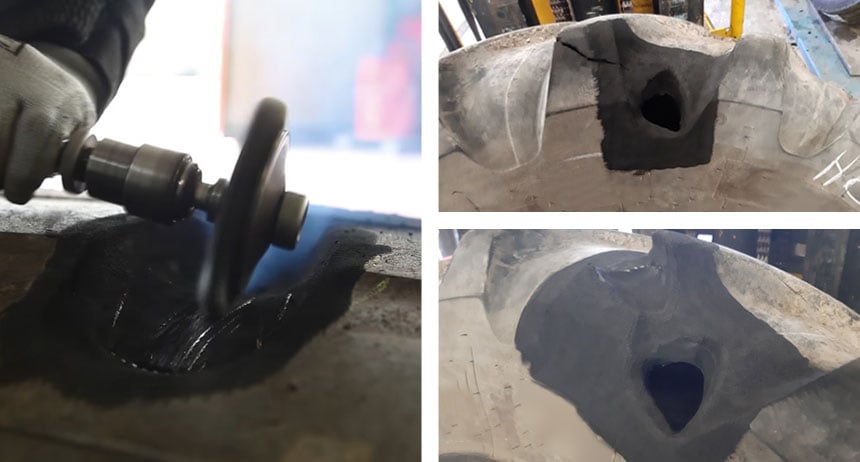
For the repairs, begin by enlarging the tyre cut and removing all the damaged or blemished parts, with adapted tools. All the parts of the casing that are cut must be removed, to prevent the cut from getting bigger.
Creating chamfers around the cut is important to ensure that the repair fits perfectly into the space created and to obtain complete adhesion of the old and new rubber.
When the cut is perfectly prepared, you can begin the repair process which must be carried out on the interior and on the exterior of the tyre simultaneously.
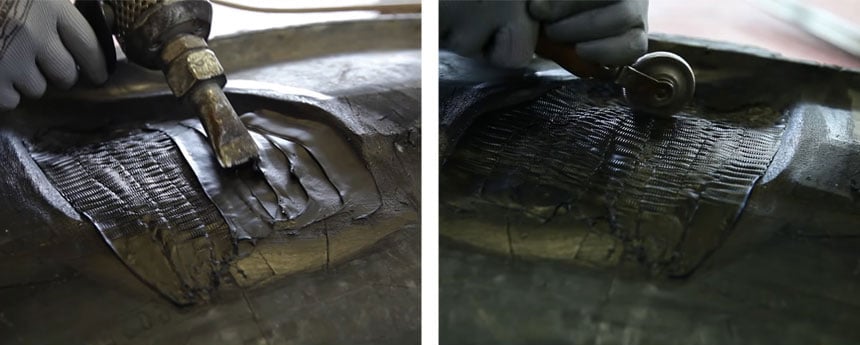
On the exterior part, crude rubber must be used and applied to the tyre using an extruder which heats the rubber to 80°.
The rubber is then compressed with a roller to eliminate any air bubbles.
The interior and exterior of the tyre must be repaired simultaneously
You begin by scratching the liner to remove it from the area to be repaired, then apply a specific patch for tractor tyres, which is larger than the dimension of the cut.
To ensure perfect adhesion, the patch must then be heated. Silicon membrane is used, which can be heated from 120° to 140°. It will be covered by a protective layer and compressed for the duration of the heating process.
Once the external rubber has been applied, the finishing process involves sanding and smoothing to make the tyre look new again at the level of the repair area.
Be careful, the most dangerous step is reinflation after the mounting process that allows you to position the beads. It is during this step that problems may arise, so do not stand in front of the tyre during inflation, but in line with the tyre on the other side of the tractor.
2. What are the solutions for cold repairs
There are several possibilities, but generally this type of repair must be used only for simple punctures with tubeless tyres or tyres with innerliners.
Cold repairs are not adapted to cuts on the sidewalls or tread, because in general they will not last due to the numerous flexions and defection in these areas of the tyre. For larger cuts and perforations than punctures, hot repairs will be much more effective.

How to carry out cold repairs
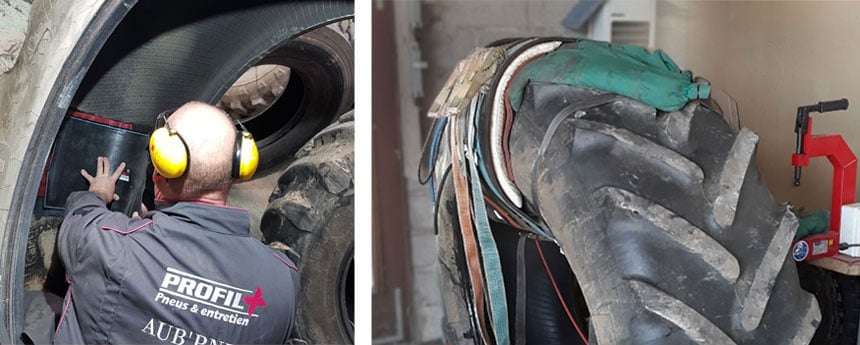
The easiest solution is to dismount the punctured tyre, leave it on its rim and take it directly to your usual tyre dealer to have the repair job done for you.
Your tyre dealer should have all the equipment necessary to carry out this type of repair in the space of fifteen minutes, of course without counting the dismounting, remounting and transport time that you require yourself.
If your tyre has an innerliner, it’s simpler overall to change the innerliner, which does not cost much. It’s better to do this than to have completed the repair job only to discover a few days later that there was another less visible leak elsewhere and have to start the whole operation again. With a new innerliner, you are sure that the problem is completely resolved.
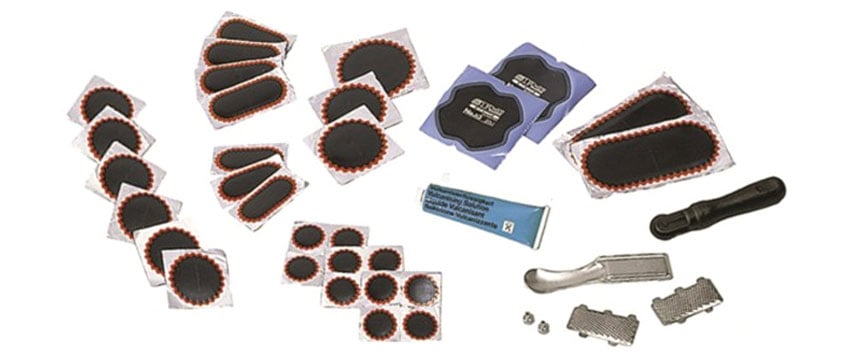
Internal repair using a patch on the innerliner
It is perfectly feasible to repair the innerliner with a standard patch, which costs practically nothing, but this will take a few hours if you do it yourself.
The tyre must be dismounted and taken off the rim in order to remove the innerliner, find the leak and repair it using a patch and a liquid vulcanising solution to ensure perfect cohesion between the components of the patch and the innerliner.
Repairing tubeless tyres from the outside or inside
This type of repair is only possible when you have no innerliner: tubeless tyre.
You can carry out the repair without dismounting the tyre if the puncture area is small and has been clearly located:
- You can see the object stuck in the tyre: a nail, a screw, a metal object, a branch, a root…
- You know exactly what caused the puncture and have clearly identified the spot: visible perforation.
You have two possibilities for repairing a puncture:
 Repair using an internal mushroom plug having first dismounted the tyre
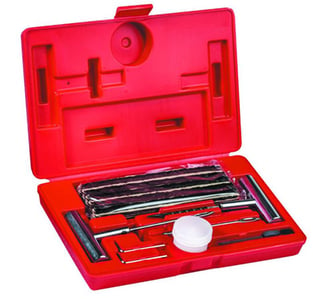
For this type of repair, you must buy a "Mushroom plug repair kit" to plug the punture hole with a rubber mushroom plug adapted to the size of the hole.
Begin by removing the foreign body completely.
Then use the tools supplied in the kit to make the hole slighlty bigger: drill through the hole so that you can insert the mushroom plug from the inside.
There are several mushroom plug sizes so that you can adapt to the precise dimension of the cleaned hole.
You should have a cold vulcanisation solution in the kit to ensure the musrhoom plug is airtight. You will need to sand the innerliner to ensure perfect contact with the base of the mushroom patch. You can insert it from the inside then pull it from the outside of the tyre and plane down the excess surface rubber.
 Temporary external repair without removing the tyre
You can use an "External wick repair kit": for a temporary repair carried out directly on-site, if you can accurately locate the hole in the tyre.
Remove the object stuck in the tyre and enlarge the hole slightly so that you can insert the wick. You have the tools necessary in the kit, a reamer to clean and enlarge the hole, an insertion tool for the wick which will let you thread the mesh through the hole.
This type of repair will not last, but will allow you to finish the job or return to the farm after repairs which should take about 15 minutes.
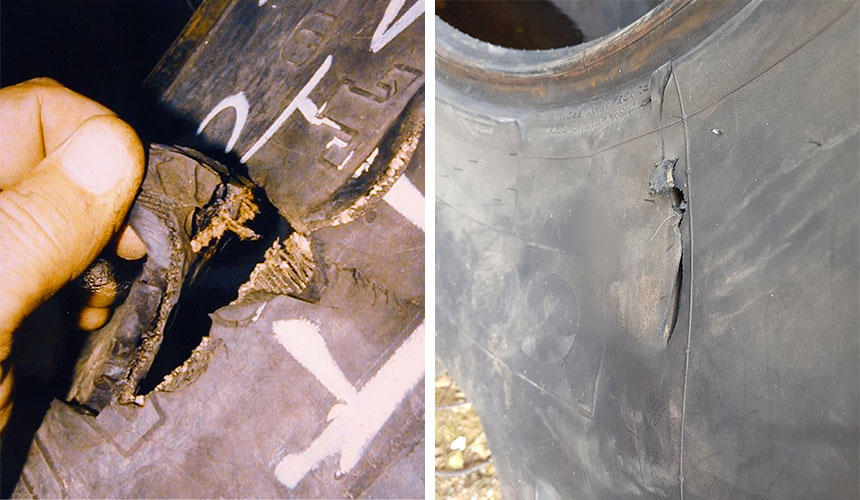
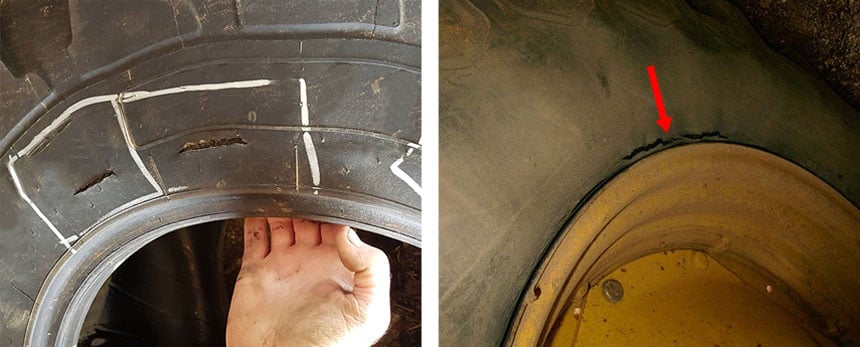
3. When shouldn’t you try to repair a tractor tyre
Repairing the tyre is not always recommended, sometimes even strongly discouraged because in certain cases it will not be sufficiently efficient to guarantee your safety. Here are a few examples of irreparable damages:
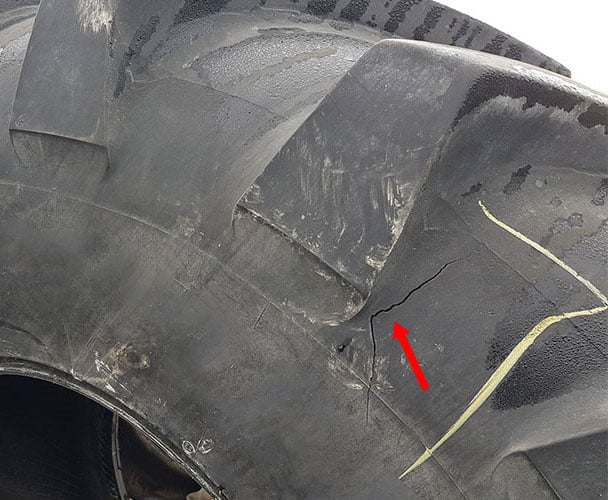
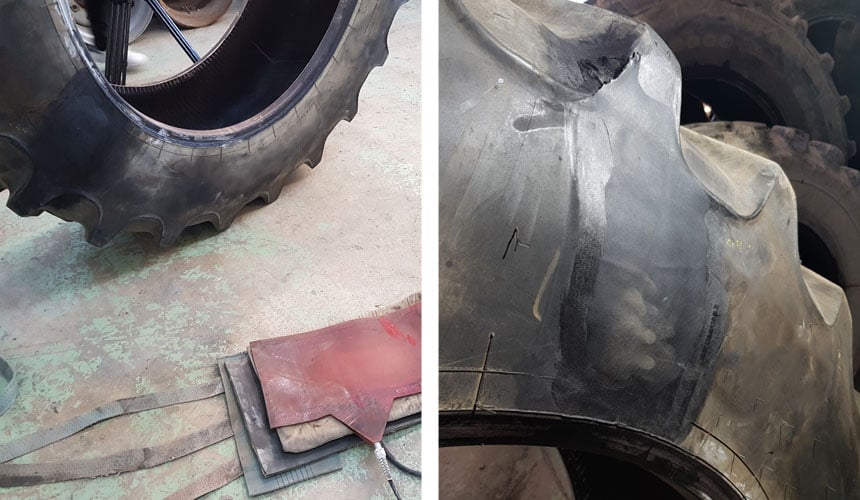
Cut on the sidewall too close to the bead
This type of cut on the sidewall is irreparable, because it is too close to the bead area. It is only reparable if it is clearly located in the centre of the sidewall between the shoulder and the bead turn-up, in which case repairs will be possible.
For effective repair work, the hot vulcanisation process should be used with a patch applied internally.
Tear in the casing at the level of the ply turn-up just above the tyre bead
This type of tear is often linked to frequent driving at too low an inflation pressure or with too heavy a load. As the casing is weakened over the entire circumference of the tyre, you should not attempt repairs, which would only last a few days. The tyre must be replaced.
Whatever the repairs required, it is always best to entrust the job to a specialist who has the right equipment to carry large tyres, to dismount and remount them on the rim, but also for the hot vulcanisation process necessary to do a decent job which complies with applicable regulations.
Even for small punctures, it’s often wiser to take your tyre off and bring it to your usual tyre dealer’s workshop where the repair job can be done in fifteen minutes rather than you spending hours without any guarantee of an impeccable result.
To learn more about ways to increase your farm’s productivity, bridgestone-agriculture has created a comprehensive eBook on the topic which is available for you to download for free:
Bridgestone-agriculture Blog is written and administered by tractor tyre experts who are available to provide you with advice on agricultural tyres. They will help you to maximise your productivity with information on all things relating to tyres: inexpensive tractor tyres, technical data for agricultural tyres, solutions for avoiding soil compaction, sprayer tyre pressure, why and how to ballast your tractor tyres, when to use dual-wheels, the mechanical causes for abnormal wear, discounted agricultural tyres, etc...
Most people who read this article have also read some of the following articles:
- 10 tips to reduce abnormal wear to your farming tyres
- Agricultural tyres: +37% wear due to misalignment
- The worst consequences linked to used tractor tyres on your soils
- Why do my front tractor tyres wear much quicker?
- How to limit agricultural tyre wear faced with heavy loads
- When does a split make it necessary to replace your tractor tyres?
DOWNLOAD FOR FREE
Increase the profitability of your operation: eBook on the essential role of tyre in cost saving